
The Best Kitchen Design Ideas for a Home That Actually Works
Ever feel like your kitchen just doesn’t work for how you actually cook, with everything scattered and counters too cramped? Kitchen design solves that by carefully planning the layout, storage, and flow so every pot, pan, and ingredient has a logical home within reach. It balances beauty with function, turning a frustrating space into a smooth, enjoyable place where meal prep feels effortless. The result is a room that saves you time, reduces clutter, and makes daily cooking a genuine pleasure.
How to Plan a Layout That Actually Works for the Way You Cook
Start by mapping your actual cooking sequence—prep, cook, plate—and place the sink, stove, and counter in that order. If you batch-prep meals, prioritize a deep landing zone beside the refrigerator; if you’re a one-pot cook, shrink prep space and enlarge the range’s clearance for handles and lids. Watch traffic: a working layout keeps the dishwasher near the sink but angled so you never block the main path while unloading. For serious bakers, dedicate a pull-out pastry slab away from the stove’s heat. Test your flow by asking: “If I’m draining pasta, do I have a dry spot to set the colander that isn’t behind me?” If the answer is no, shift the sink and cooktop to share one uninterrupted run. Your layout should feel invisible—every reach landing you where you’re already heading.
Mapping the Work Triangle: Fridge, Sink, and Stove Placement That Cuts Down Steps
The most efficient kitchens hinge on strategic work triangle placement, where the fridge, sink, and stove form a compact, unobstructed zone. Keep each leg between four and nine feet, ensuring no cabinet or island blocks the path. Position the sink centrally between the fridge and stove to streamline washing, prepping, and cooking sequences. Place the stove away from the main doorway to prevent traffic from interrupting your flow. A slightly asymmetric triangle often outperforms a perfect one because it mirrors your actual cooking habits. This layout minimizes pivoting, slashes unnecessary steps, and keeps every essential tool within two strides.

- Place the sink in the middle of the triangle for balanced prep access.
- Avoid placing the fridge near a corner to prevent door swing blockage.
- Keep the stove clear of the sink’s spray radius to prevent fire hazards.
- Ensure counter space exists between each appliance for hot pots and cold ingredients.
Zoning for Multi-Tasking: Separate Prep, Cooking, and Cleaning Stations
Think of your kitchen as three little neighborhoods, each with a clear job. Zoning for multi-tasking means giving prep, cooking, and cleaning their own dedicated spots so you’re not crossing paths mid-meal. Put the cutting board and knives near the sink for easy water access, but keep the stove zone clear for pots and spatulas. The cleaning station—sink and dishwasher—should be at one end, so dirty dishes never block your chopping area. This way, you can chop veggies while sauce simmers and rinse a pan without bumping elbows.
- Keep a trash bin and compost caddy tucked under the prep zone, not the cooking zone.
- Place a heatproof landing spot (like a marble slab) right beside the stove for hot pans.
- Store cleaning supplies under the sink so wiping down happens in one motion.
- Designate a “drop zone” for dirty dishes near the dishwasher, away from prep surfaces.
What Are the Best Materials for Countertops and Cabinetry That Last?
For countertops that endure decades of dinner parties and messy mornings, quartzite and granite top the list—their natural density shrugs off scratches, heat, and acidic spills that would etch softer stone. In cabinetry, solid wood with a catalyzed lacquer finish, like maple or oak, resists warping and chipping far better than thermofoil or MDF, which peel near sinks and dishwashers. The real victory comes from pairing tough surfaces with robust hinges and soft-close hardware, since a cabinet’s skeleton matters more than its skin. Marine-grade plywood boxes with dovetailed drawers handle daily slams without sagging, while a sealed butcher-block island offers a warm, renewable work zone that, with occasional oiling, lasts as long as any engineered slab. Choose matte, non-porous finishes—they hide fingerprints and require less aggressive cleaning, preserving that “new kitchen” feel for years.
Comparing Quartz, Granite, and Butcher Block for Durability and Maintenance

When comparing quartz, granite, and butcher block for durability and maintenance, quartz leads in resilience because it is non-porous, resisting stains and bacteria without sealing. Granite offers superior heat and scratch resistance but demands annual sealing to prevent moisture absorption. Butcher block is the most vulnerable to water damage, knife scars, and heat, requiring regular oiling and sanding to maintain its surface. For longevity with minimal upkeep, quartz is the lowest-maintenance option, while granite suits those accepting periodic sealing. Butcher block works only for meticulous owners willing to refinish it repeatedly.
- Quartz: no sealing, avoid excessive heat, wipe with mild soap.
- Granite: seal yearly, handle hot pans directly, clean with pH-neutral cleaner.
- Butcher block: oil monthly, sand out stains, never leave water pooled.
Choosing Cabinet Finishes That Resist Moisture, Heat, and Daily Wear
For cabinetry that survives steam, splatter, and constant handling, prioritize finishes that resist moisture, heat, and daily wear over mere aesthetics. A multi-layer polyurethane or conversion varnish creates a tough, waterproof barrier, outperforming standard lacquer against warping and peeling. Opt for thermofoil or laminate wrapped doors for seamless, non-porous protection, while thermally fused melamine offers a budget-friendly alternative. Avoid raw wood edges; instead, seal them meticulously. For hardware-adjacent zones, a matte or textured finish masks fingerprints and micro-scratches better than high-gloss. Finally, choose factory-cured finishes, as they bond harder than site-applied ones, ensuring your doors resist humidity spikes and hot pan contact without discoloration.
Q: What is the most durable cabinet finish for a busy, steamy kitchen?
A: A catalyzed polyurethane or conversion varnish—both cure into a cross-linked film that blocks moisture absorption and withstands heat up to 180°F, making them ideal for daily wear near ovens and sinks.
How Much Storage Do You Really Need and Where Should It Go?
Before adding cabinets, audit what you actually own; most kitchens operate well on roughly 1.5 to 2 times your countertop square footage in storage. Prioritize a **dedicated landing zone** near the sink and stove for daily tools, then allocate deep drawers for pots and a vertical pantry for dry goods. Place dishes closest to the dishwasher or sink, while storing spices within arm’s reach of the prep zone—not scattered. Reserve upper cabinets for lightweight, occasional items like platters, and use a tall pullout for brooms and cleaning supplies. If you cook daily, add a drawer for lids and a tray for cutting boards. **Smart storage placement** reduces wasted steps: keep heavy mixers on lower shelves, not overhead. Always measure your largest tray and tallest cereal box before designing, so every inch serves a purpose.
Smart Drawer Dividers, Pull-Out Shelves, and Corner Solutions for Dead Space
Once you’ve mapped out your total storage volume, the real win lies in targeting awkward voids. Smart drawer dividers, pull-out shelves, and corner solutions for dead space transform wasted inches into high-function zones. Instead of guessing how many cabinets you need, you calibrate storage around specific items—utensils, pans, spices—using adjustable dividers that keep every tool visible and reachable. Pull-out shelves eliminate the dark, bent-over scramble by gliding heavy pots and small appliances straight to you, doubling usable space without adding footprint. For blind corners, try lazy Susans, swing-out racks, or “magic” corner pull-outs that pivot and slide, retrieving items previously lost forever. These solutions let you store more vertically and radially, not just linearly, making every cubic inch count.
Q: Are smart drawer dividers worth it if my drawers are already small?
A: Absolutely—they prevent vertical stacking chaos, letting you pack nested items and small tools more densely while keeping order, so you’ll actually use what you own.
Upper vs. Lower Cabinetry: Balancing Easy Access and Hidden Clutter
Upper cabinets place daily-use items—glasses, mugs, spices—at eye level, saving you from constant bending while keeping countertops clear. Lower cabinets excel at stowing heavy appliances, pots, and bulk pantry goods, hiding clutter that would otherwise dominate your visual field. The real balance lies in assigning high-frequency items above and low-frequency, weighty gear below. For example, put plates and bowls up top, but reserve deep drawers for mixing bowls and sheet pans. This division keeps workflow efficient without sacrificing a streamlined look. Strategic upper and lower cabinet allocation means the things you touch most live where your hands naturally go, while the chaos stays tucked away.
Q: What is the smartest way to divide storage between uppers and lowers?
A: Dedicate uppers to lightweight, frequently used items you want visible and accessible, and assign lowers to heavy or rarely used equipment that benefits from being hidden and pulled out on wheels or drawers.
What Lighting Setup Makes a Kitchen Both Functional and Inviting?
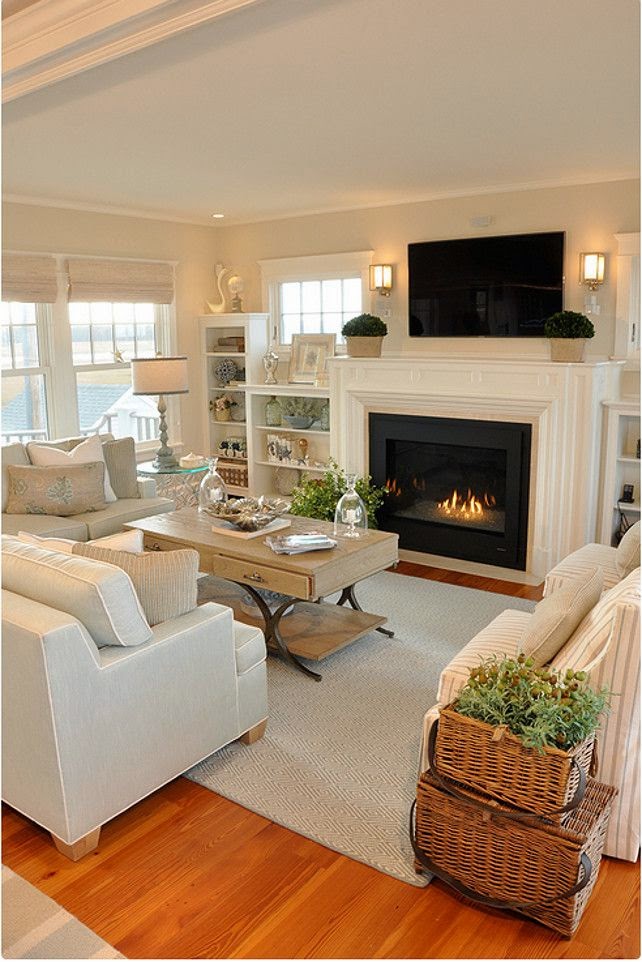
The best kitchen lighting layers three distinct types: ambient, task, and accent. Ambient ceiling fixtures, like recessed dimmers, wash the room in soft, even light for safety. Under-cabinet LED strips directly illuminate countertops, eliminating shadows that fall where you chop or read recipes. Pendant lights over an island, hung 28–32 inches above the surface, create a warm, social glow while acting as sculptural focal points. To feel inviting, use dimmable switches on every layer—bright for meal prep, low for evening gatherings. What’s the trick for balancing function and mood? Install separate circuits for each layer, so you can adjust from crisp task work to cozy intimacy without flipping every switch. The result is a kitchen that flexes from workspace to gathering spot, where light follows your activity naturally.
Layering Task, Ambient, and Accent Lights for Cooking and Dining
Effective kitchen lighting relies on **layering task, ambient, and accent lights for cooking and dining**. Direct under-cabinet LEDs eliminate shadows on countertops, while a dimmable central pendant provides gentle overall illumination for safe movement. For the dining zone, a low-hanging fixture over the table acts as both task light for eating and visual anchor. Accent lighting inside glass-front cabinets or along toe-kicks adds depth without competing with functional beams. Use separate switches for each layer so you can adjust intensity from bright prep to soft evening dining.
Under-Cabinet and Pendant Placement to Eliminate Shadows on Work Surfaces
To banish shadows on counters, mount **under-cabinet lights toward the front edge** of upper cabinets, angling them slightly downward so the beam hits the backsplash and countertop junction rather than the backsplash alone. For pendants, position them 28–36 inches above the island surface, centered over the work zone—not the island’s geometric middle—so your body never blocks the light. Stagger multiple pendants along the prep path, spacing them 24–30 inches apart, to overlap their pools of illumination. Pair a dimmable strip under cabinets with a single low-hanging pendant over the sink to eliminate dark corners. Layered task lighting from both fixtures ensures every chop, slice, and read is shadow-free.
Q: How close should under-cabinet lights sit to the front edge?
A: Place them 1–2 inches from the front lip, angled outward, so the light hits your hands and knife, not the wall behind the stove.
Which Appliance Sizes and Styles Fit Your Kitchen Without Overwhelming It?
Proportions dictate harmony: a 30-inch range suits a 10-foot run, while a 48-inch pro-style beast demands at least 15 feet of cabinetry to breathe, otherwise it visually swallows the room. For standard ceilings, counter-depth refrigerators (24 inches deep) align flush with cabinets, avoiding that bulky, jutting silhouette; choose a 36-inch width unless your kitchen exceeds 12 linear feet of storage. Sleek, integrated dishwashers with custom panels vanish into millwork, reducing visual clutter, whereas a stainless front works best in larger, open-plan spaces. Q: When is a column freezer-and-fridge pair appropriate? A: Only for kitchens wider than 20 feet, where separated units balance the wall instead of crowding a single corner. Prioritize panel-ready styles for under 150 square feet; reserve exposed metal for expansive layouts.
Matching Refrigerator, Range, and Dishwasher Dimensions to Your Space
To avoid a cramped or disjointed layout, start by measuring appliance footprints against your cabinet run before any purchase. For the refrigerator, allow at least 1 inch of clearance on the hinge side and confirm the depth aligns with your countertop’s overhang—otherwise, it will jut out awkwardly. The range needs an exact 30-inch or 36-inch opening, but verify the gas line or plug location sits within that cutout, not behind a side panel. For the dishwasher, match its width to the rough opening, ideally 24 inches, and check that the door can swing fully without hitting the adjacent drawer fronts. The trickiest dimension is often the dishwasher’s depth, which must clear the sink’s plumbing if installed next to it. Follow this sequence:
- Measure the width, depth, and height of each designated alcove.
- Subtract ¾ inch on all sides for ventilation and wiggle room.
- Compare those numbers to the appliance spec sheet, not the box dimensions.
- Dry-fit with cardboard templates if you’re between two sizes.
Prioritizing these numbers now prevents costly countertop modifications later.

Built-In vs. Freestanding Options: Pros and Cons for Workflow and Cleaning
Built-in appliances create a seamless countertop run, eliminating the crevices where crumbs and grease hide, which dramatically simplifies daily wiping. However, their fixed position dictates your workflow—you cannot reposition them for occasional large-scale cooking or entertaining. Freestanding units offer flexibility; you can shift them divine home to accommodate a temporary prep station or deep-clean behind them with ease. Yet, their exposed sides and backs collect dust and require diligent attention to gaps between units. Choosing built-in means committing to a permanent ergonomic sequence, while freestanding prioritizes adaptability over a polished, uninterrupted aesthetic. For cleaning, built-ins win on surface convenience but lose on access to plumbing and vents. Workflow efficiency ultimately hinges on whether you prefer a rigid, optimized layout or a rearrangeable, serviceable setup.
Question: What is the biggest cleaning trade-off between built-in and freestanding appliances?
Built-ins eliminate external gaps for faster wipe-downs but make behind-the-unit access a service-call ordeal, whereas freestanding units let you pull them out for thorough floor and wall cleaning at the cost of exposed edges that collect grime.
How Do You Choose a Color Palette and Finish That Feels Timeless Yet Personal?
To choose a timeless yet personal kitchen palette, anchor your scheme in enduring neutrals like warm white, soft greige, or deep charcoal for cabinetry and walls. These act as a quiet backdrop, preventing the space from dating. Then, inject personality through durable, tactile finishes—think natural oak, honed marble, or brushed brass—which bring warmth and character without shouting a trend. For a truly personal note, select one accent color from a cherished object—a vintage rug or ceramic piece—and apply it sparingly to a pantry door or open shelving. Avoid color-blocked cabinets or high-gloss laminates; instead, prioritize matte or low-sheen surfaces that softly reflect light and mask wear, ensuring your choices feel integrated and lived-in rather than staged for a season.
Balancing Dark Islands with Light Perimeter Cabinets for Visual Depth
For balancing dark islands with light perimeter cabinets, the contrast anchors the room while preventing heaviness. Dark islands absorb light, creating a grounded focal point, but require light upper and lower perimeter cabinets to reflect illumination and keep sightlines open. To avoid starkness, tie the island’s finish to subtle undertones—charcoal with warm gray perimeters, or deep navy with off-white—so the shift feels deliberate, not jarring. Sequence the finish selection: first lock the island’s material (matte avoids glare), then choose perimeter sheen (satin for durability), finally match hardware finishes (brushed brass or matte black) across both zones. This ensures the depth reads as layered, not fragmented.
Textures and Hardware Finishes That Tie the Whole Room Together
Textures and hardware finishes act as the quiet connectors that unify a kitchen’s palette, so choose them with intent. Pair brushed brass or matte black hardware with the same metal in your faucet and lighting pendants to create a visual thread that feels deliberate, not accidental. Counteract sleek cabinetry with a honed stone backsplash or a hand-troweled plaster texture, adding depth without introducing new colors. For a timeless yet personal result, mix one warm tactile surface—like oil-rubbed bronze knobs on a walnut island—with cool, smooth quartz on perimeter counters. This balance prevents the room from feeling flat while keeping the eye moving naturally.
Q: How many hardware finishes should you use in a single kitchen?
A: Stick to one dominant metal for all visible pieces, then allow a single secondary finish—like a matte black pot filler—to add subtle contrast without competing.